How to Set Up a Hardware Wallet: Complete Step-by-Step Guide
Published November 5, 2026
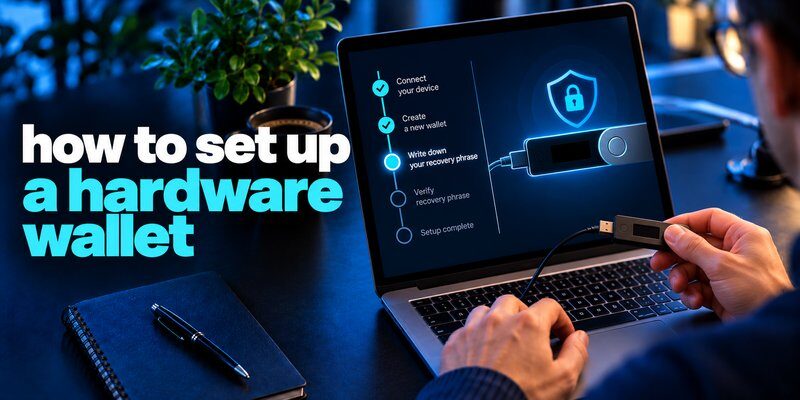
Learning how to set up a hardware wallet is one of the most important steps in protecting your cryptocurrency from online threats. Unlike software wallets, hardware wallets keep your private keys in a dedicated physical device, reducing their exposure to malware, phishing attacks, and compromised computers.
To set up a hardware wallet, purchase a genuine device, install its official companion application, initialize a new wallet, securely back up your recovery phrase, create a PIN, verify your receiving address, and complete a small test transaction.
This guide explains how to set up a hardware wallet step by step, including practical instructions for beginners, recovery phrase protection, transaction verification, and common setup mistakes.
What Is a Hardware Wallet and How Does It Work?
A hardware wallet is a physical cryptocurrency security device designed to generate, store, and use private keys without exposing them directly to an internet-connected computer or smartphone.
When you send cryptocurrency, the hardware wallet signs the transaction using private keys protected by the device. The signed transaction can then be broadcast to the blockchain through a connected application.
Unlike keeping cryptocurrency directly on an exchange, a self-custody hardware wallet gives you control over the keys used to access your assets.
However, the cryptocurrency itself remains recorded on the blockchain. The hardware wallet protects the private keys that authorize transactions.
Secure your accounts with fast, reliable two-factor authentication. Download now and protect your login in seconds.Download Authenticator App
Why Should You Use a Hardware Wallet?
Understanding how to set up a hardware wallet is particularly useful if you want to hold cryptocurrency for an extended period or reduce your dependence on online custodial services.
The main advantages include:
- Offline private key protection: Private keys are designed to remain inside the hardware device during normal operations.
- Physical transaction confirmation: Supported transactions require approval through the wallet’s trusted interface.
- Recovery capabilities: A correctly backed-up recovery phrase can help restore access if the device is lost or damaged.
- Multi-asset support: Many hardware wallets support Bitcoin, Ethereum, and other cryptocurrencies, depending on the model and software.
- Reduced malware exposure: The device separates private-key operations from the connected computer.
A hardware wallet does not eliminate every risk. Phishing, malicious transaction approvals, exposed recovery phrases, and incorrect network selections can still result in financial loss.
Scammers may impersonate hardware wallet manufacturers or authorized sellers to distribute compromised devices or fake setup instructions. Understanding what is social engineering can help you recognize fraudulent support messages, suspicious seller claims, and attempts to obtain your recovery information.
Read more: How to Protect Your Seed Phrase: 10 Essential Tips
How to Set Up a Hardware Wallet in 7 Steps
If you are wondering how to set up a hardware wallet for the first time, follow these seven steps in order.
| Step | What You Need to Do | Expected Result |
|---|---|---|
| 1 | Purchase and verify your device | Genuine hardware wallet |
| 2 | Install official wallet software | Trusted companion application |
| 3 | Initialize a new wallet | Fresh wallet keys generated |
| 4 | Create a PIN and back up recovery words | Device access and recovery secured |
| 5 | Connect the wallet and verify addresses | Wallet ready to receive crypto |
| 6 | Send a small test transaction | Receiving process verified |
| 7 | Test sending and verify recovery | Setup validated before larger transfers |
Step 1: Purchase and Verify Your Hardware Wallet
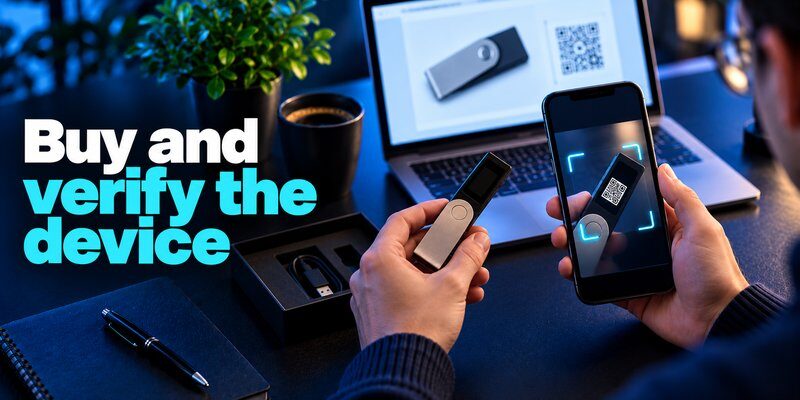
The first step in how to set up a hardware wallet is choosing a legitimate device that supports your cryptocurrency and preferred blockchain networks.
Popular hardware wallet manufacturers include Ledger, Trezor, and BitBox. Their devices differ in supported assets, connection methods, recovery options, and security features.
Before purchasing, consider:
- Supported cryptocurrencies and blockchain networks
- Compatibility with Windows, macOS, Android, or iOS
- Availability of official companion software
- Backup and recovery options
- Firmware update procedures
- Device authentication and security verification
Purchase directly from the manufacturer or an authorized retailer whenever possible.
After receiving your hardware wallet, inspect the packaging and follow the manufacturer’s official device-authenticity verification process. Packaging and seals alone cannot guarantee authenticity.
Important: Never use a hardware wallet that arrives with a recovery phrase already written down. A legitimate new-wallet setup should generate fresh recovery information during initialization.
Fake wallet download pages and sponsored search results can imitate legitimate manufacturers to trick users into installing malicious software or revealing recovery information. Follow our guide on how to avoid phishing scams to learn how to verify website addresses, identify impersonation attempts, and avoid suspicious download links.
Read more: How to Set Up a Passkey: A Complete Step-by-Step Guide
Step 2: Download and Install the Official Wallet Software
The next step in how to set up a hardware wallet is installing the official companion application provided by the manufacturer.
This software allows you to manage accounts, view balances, prepare transactions, and install supported firmware updates.
For example:
- Ledger devices generally use the official Ledger Wallet application, formerly called Ledger Live.
- Trezor devices use Trezor Suite.
- Other manufacturers provide their own setup applications or supported wallet integrations.
To install the software safely:
- Open the manufacturer’s official website by entering its address directly.
- Navigate to the downloads or getting-started section.
- Select the application compatible with your operating system.
- Download and install the software.
- Follow the manufacturer’s instructions for verifying the application or device.
- Connect your hardware wallet when prompted.
Avoid downloading wallet software through unfamiliar advertisements, unofficial websites, or links sent through unsolicited messages.
Security tip: Legitimate setup software should not require you to type a newly generated hardware wallet recovery phrase into a website or ordinary computer form.
Step 3: Initialize Your Hardware Wallet
Once the official application is installed, you can begin initializing your device.
This is a critical stage when learning how to set up a hardware wallet because the initialization process establishes the cryptographic keys that control your cryptocurrency.
Follow these instructions:
- Connect or power on your hardware wallet.
- Open the manufacturer’s official companion application.
- Select the option to create or set up a new wallet.
- Follow the instructions displayed on the hardware device.
- Complete any required firmware installation or authenticity checks.
- Allow the device to generate fresh wallet keys and recovery information.
The exact interface depends on the hardware wallet model.
Some devices generate a traditional recovery phrase, while others support alternative backup methods. Always follow the official setup procedure for your specific model.
Do not select an option to restore an existing wallet unless you intentionally want to recover a wallet you already own.
Read more: How to Switch to Passwordless Login Without Losing Access
Step 4: Create a PIN and Secure Your Recovery Phrase
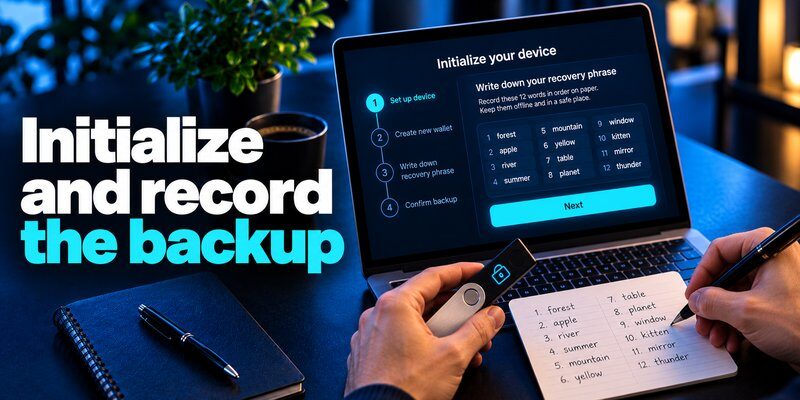
Protecting your recovery information is one of the most important parts of how to set up a hardware wallet securely.
During setup, most hardware wallets require you to create a PIN and establish a backup method.
Create a Strong Device PIN
A PIN helps prevent unauthorized access to the physical device.
When creating your PIN:
- Avoid easily guessed combinations.
- Do not reuse a PIN associated with another account.
- Keep the PIN private.
- Follow the device’s recommended PIN length and security requirements.
- Understand the device’s lockout or reset behavior after repeated incorrect attempts.
Remember that a PIN protects access to the hardware device. It does not replace the wallet’s recovery backup.
If you opened a suspicious hardware wallet setup website, downloaded an unfamiliar application, or entered account credentials on a fake page, the appropriate response depends on what information was exposed. Read what to do if you clicked a phishing link for incident-response steps. If you disclosed a wallet recovery phrase, treat the associated wallet as compromised rather than relying on a password or PIN change.
Write Down Your Recovery Phrase
Many hardware wallets generate a recovery phrase consisting of 12, 18, or 24 words, although the exact format depends on the device.
These words can be used to reconstruct the wallet’s private keys in a compatible recovery environment.
To protect your recovery phrase:
- Record each word in the exact order displayed by the trusted hardware device.
- Check spelling and word sequence carefully.
- Complete the manufacturer’s backup confirmation procedure.
- Store the backup offline in a secure location.
- Protect it from theft, fire, water, and accidental disposal.
- Never share it with anyone requesting wallet verification or technical support.
Avoid taking screenshots, saving recovery words in cloud notes, or sending them through email.
For additional guidance, read how to protect your seed phrase.
Should You Enable an Optional Passphrase?
Some hardware wallets support an additional passphrase that creates a separate wallet derived from the recovery information.
Although this feature can provide additional protection, forgetting the exact passphrase may make the associated assets permanently inaccessible.
Beginners should understand and verify the standard backup process before enabling advanced passphrase features.
Step 5: Connect Your Hardware Wallet and Verify Your Address
After initialization, the next stage of how to set up a hardware wallet involves connecting the device to its companion application and preparing an account to receive cryptocurrency.
Depending on your device, the connection may use USB, Bluetooth, or another manufacturer-supported method.
To prepare a receiving address:
- Open the official wallet application.
- Connect and unlock your hardware wallet.
- Add or select the cryptocurrency account you want to use.
- Choose the Receive option.
- Select the correct asset and network.
- Display the receiving address.
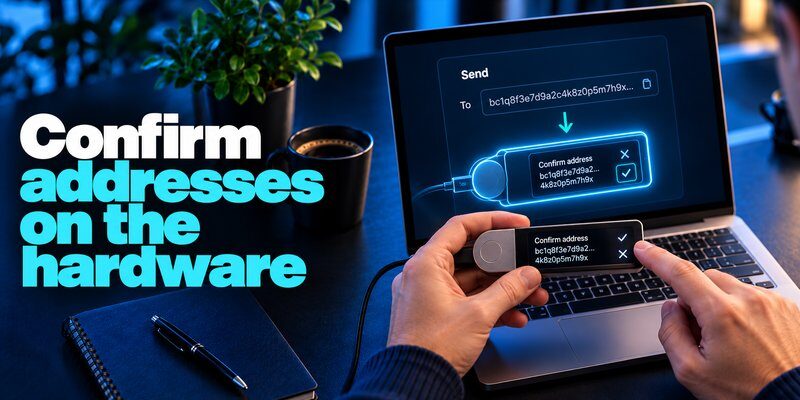
- Verify that the address shown in the application matches the address displayed on your hardware wallet.
- Confirm the address on the device when required.
Never rely exclusively on the address displayed on your computer or smartphone.
Malware may replace copied cryptocurrency addresses with addresses controlled by an attacker.
Checking the address on the trusted hardware display helps reduce this risk.
Also remember that different cryptocurrencies and blockchain networks may use different addresses or transaction requirements.
Read more: Passkeys vs Passwords: What Is the Difference and Which Is Safer?
Step 6: Send a Small Test Transaction
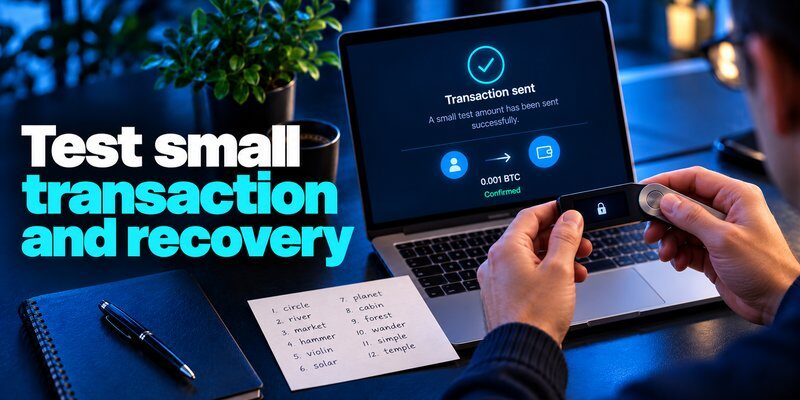
A practical way to confirm how to set up a hardware wallet correctly is to complete a small receiving transaction before transferring a larger balance.
Start with an amount you can afford to lose if a mistake occurs.
For example, you could transfer a small amount of supported cryptocurrency from an exchange account to your new hardware wallet address.
Follow these steps:
- Sign in to your exchange or existing wallet.
- Choose the cryptocurrency you want to transfer.
- Select the withdrawal or send option.
- Enter the receiving address verified on your hardware wallet.
- Choose the correct blockchain network.
- Review the withdrawal amount and applicable fees.
- Confirm the transaction using the exchange’s security procedures.
- Wait for the transaction to receive the required blockchain confirmations.
- Check that the balance appears in your wallet application.
The minimum withdrawal amount and network fees depend on the asset, exchange, and network.
Do not transfer your entire cryptocurrency balance until you have confirmed that the receiving process works correctly.
Step 7: Test Sending Transactions and Verify Recovery
The final step in how to set up a hardware wallet is verifying that you can securely send funds and recover the wallet if necessary.
Receiving cryptocurrency successfully does not automatically confirm that you understand transaction signing or recovery procedures.
Test an Outgoing Transaction
To test sending cryptocurrency:
- Open the wallet application.
- Select an account with a small available balance.
- Choose Send.
- Enter a trusted destination address.
- Review the amount, network, and transaction fee.
- Check the transaction details displayed on your hardware wallet.
- Approve the transaction using the physical device.
- Confirm that the transaction reaches its destination.
Reject any transaction if the device displays an unexpected address, amount, or contract request.
Verify Your Recovery Backup
A hardware wallet can be lost, damaged, or become unusable. Your recovery information must be accurate before you rely on the wallet for significant funds.
Use the manufacturer’s official backup verification feature or documented recovery procedure.
A full device reset is not necessary for every wallet and can introduce additional risk if performed incorrectly.
Before attempting any reset, confirm that you understand the recovery process and have a complete, verified backup.
Read more: How to Set Up Face ID on iPhone and Check That It Works
How to Set Up a Ledger Hardware Wallet
If you are using a Ledger device, the general hardware wallet setup process follows these stages:
- Obtain the device through an official or authorized sales channel.
- Download the official Ledger Wallet application.
- Connect or power on your device according to its model.
- Choose to set up a new device.
- Create your device PIN.
- Generate and verify the recovery phrase through the device’s supported process.
- Complete the official genuine-device check.
- Add a supported cryptocurrency account.
- Verify a receiving address on the Ledger device.
- Complete a small test transaction.
The exact order of some steps may vary by model and firmware version.
Always follow the current instructions provided by Ledger rather than assuming that every device uses the same setup screens. Hardware wallet security also depends on the computer or smartphone used to manage transactions. Review our personal cybersecurity checklist for practical ways to maintain device updates, reduce malware exposure, and protect the accounts associated with your cryptocurrency activity.
How to Set Up a Trezor Hardware Wallet
For Trezor users, learning how to set up a hardware wallet involves a similar process, with device-specific recovery and authentication options.
A typical setup includes:
- Visit the official Trezor website.
- Download and install Trezor Suite.
- Connect your Trezor device.
- Follow the device authentication and firmware instructions.
- Choose to create a new wallet.
- Configure the available device security settings.
- Generate and securely record your wallet backup.
- Complete the backup verification process.
- Select the cryptocurrency account you want to use.
- Verify your receiving address and perform a small transaction.
Trezor models may support different recovery formats and security features.
Follow the official documentation for your particular device rather than entering recovery words into an unfamiliar application.
Read more: What Is Phishing? Meaning, Examples, and a Safe Response
Common Hardware Wallet Setup Mistakes to Avoid
Even after learning how to set up a hardware wallet, beginners can make mistakes that put their cryptocurrency at risk.
The following table summarizes common problems and how to avoid them.
| Common Mistake | Why It Is Risky | Recommended Action |
|---|---|---|
| Buying from an unknown seller | Device or setup may be compromised | Use official or authorized channels |
| Using a prewritten recovery phrase | Someone else may control the wallet | Generate a fresh wallet backup |
| Saving recovery words online | Malware or account breaches may expose them | Keep recovery information offline |
| Choosing the wrong network | Funds may be lost or difficult to recover | Verify asset and network compatibility |
| Skipping address verification | Malware may substitute an attacker address | Check the hardware display |
| Sending all funds immediately | Setup mistakes may cause major losses | Start with a small test |
| Forgetting an optional passphrase | The associated wallet may become inaccessible | Verify and securely preserve recovery details |
| Approving unknown contracts | Malicious approvals can expose assets | Review and reject suspicious requests |
What If Your Hardware Wallet Is Not Connecting?
If your device does not connect to the companion application, try the following:
- Confirm that the device is powered on and unlocked.
- Check that the USB cable supports data transfer, if applicable.
- Restart the official companion application.
- Verify operating system compatibility.
- Review the manufacturer’s supported connection methods.
- Follow official troubleshooting guidance before changing firmware.
Never enter your recovery phrase into a website claiming it can repair a connection problem.
What If Your Hardware Wallet Does Not Show Your Balance?
A missing balance does not necessarily mean your cryptocurrency has disappeared.
Check whether:
- You selected the correct cryptocurrency account.
- The wallet application supports the relevant network.
- The transaction has received sufficient confirmations.
- The correct account or derivation settings are being used.
- The wallet application is synchronized properly.
You can also inspect the transaction through a reputable blockchain explorer without entering private keys or recovery information.
How to Keep Your Hardware Wallet Secure After Setup
Knowing how to set up a hardware wallet is only the beginning. Long-term cryptocurrency security also requires protecting your recovery information, connected accounts, and transaction approval process.
Keep Firmware and Wallet Software Updated
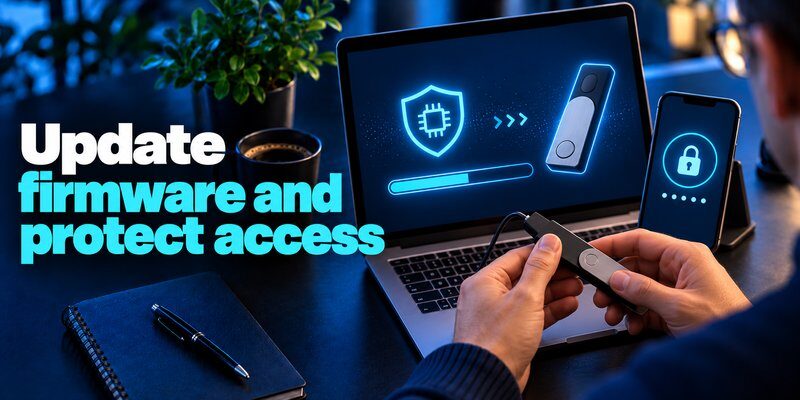
Install firmware and software updates through the manufacturer’s official channels.
Before updating, review the release instructions and ensure that your recovery backup is secure.
Do not approve unexpected firmware requests from unfamiliar websites.
Store Your Device and Recovery Backup Separately
Keep your hardware wallet in a secure physical location and protect its recovery information separately.
Anyone who obtains the complete recovery secret, including any required additional passphrase, may be able to restore and control the wallet.
A hardware wallet PIN alone cannot protect assets after the recovery secret has been compromised.
Protect Cryptocurrency Exchange Accounts With 2FA
Your hardware wallet protects self-custody private keys, but exchange accounts and associated email accounts require their own security measures.
Use strong, unique passwords, passkeys where supported, and authenticator-based two-factor authentication.
For additional account protection, consider an authenticator app that supports time-based one-time passwords.
You can also explore a two-factor authentication app for iPhone for compatible exchange and online accounts.
An authenticator application protects account sign-ins. It does not replace the hardware wallet or store its recovery phrase.
For broader cryptocurrency protection, see how to secure a crypto wallet.
What Happens If You Lose Your Hardware Wallet?
One common concern when researching how to set up a hardware wallet is whether cryptocurrency disappears if the physical device is lost.
In most conventional recovery-phrase-based setups, losing the device does not automatically mean losing access to your funds.
You may be able to restore the wallet using a compatible device and the correct recovery information.
However, recovery depends on the wallet’s backup method, derivation settings, optional passphrase, and compatibility.
If the device is lost:
- Determine whether the device may have been stolen or accessed.
- Obtain a trusted replacement device if necessary.
- Follow the manufacturer’s official recovery instructions.
- Restore the wallet using your secure backup.
- Verify the recovered accounts and addresses.
- If the recovery information may also be compromised, create a new wallet and transfer assets to it securely.
Never disclose your recovery phrase to someone offering wallet recovery assistance.
Frequently Asked Questions
How long does it take to set up a hardware wallet?
A basic setup may take approximately 15–30 minutes, depending on the device, firmware updates, and backup process. Testing transactions and recovery can take additional time.
Can beginners set up a hardware wallet?
Yes. Most consumer hardware wallets provide guided initialization through their official applications. Beginners should follow the manufacturer’s instructions carefully and verify their recovery backup before transferring significant funds.
Do I need a computer to set up a hardware wallet?
Not always. Some hardware wallets support setup through compatible smartphones, while others require a desktop application or specific connection method. Check the manufacturer’s requirements before purchasing.
Can I use a hardware wallet without the internet?
Hardware wallets can protect private keys and perform certain operations without directly connecting to the internet. However, checking live balances and broadcasting blockchain transactions generally requires an internet-connected application or service.
Can I store multiple cryptocurrencies on one hardware wallet?
Many hardware wallets support multiple cryptocurrencies, but compatibility varies by device, blockchain, and wallet application. Verify support for your specific assets before transferring funds.
What happens if I forget my hardware wallet PIN?
Depending on the device, repeated incorrect PIN attempts may lock or reset the wallet. A verified recovery backup can often restore access, but procedures vary by manufacturer.
Is a recovery phrase the same as a private key?
Not exactly. A recovery phrase commonly represents information used to derive wallet keys. It can provide access to many accounts associated with the wallet, which is why it must be protected carefully.
Should I connect my hardware wallet to MetaMask?
Some supported hardware wallets can connect to MetaMask or other compatible interfaces. This may allow transactions to be approved through the hardware device, but malicious signatures and contract approvals can still put assets at risk.
Is setting up a hardware wallet free?
The initialization process generally does not require a separate blockchain payment, but purchasing the physical device costs money. Sending cryptocurrency and interacting with blockchain networks may involve transaction fees.
Final Thoughts
Learning how to set up a hardware wallet correctly helps you establish a more secure foundation for managing cryptocurrency.
The essential process includes verifying your device, installing official software, creating a new wallet, protecting your recovery information, confirming addresses on the hardware display, and testing transactions before transferring significant funds.
Remember that hardware wallet security depends on more than the physical device. Your recovery backup, transaction approvals, and connected accounts must also remain protected.
By following the setup instructions carefully and maintaining a secure recovery plan, you can reduce common risks associated with self-custody cryptocurrency storage.