
How to Set Up a Passkey: A Complete Step-by-Step Guide
Published October 30, 2026

How to set up a passkey: Sign in to an account that supports passkeys, go to its Security or Sign-in settings, select Create a passkey, and verify your identity using Face ID, Touch ID, fingerprint, or your device PIN. Once saved, you can sign in without entering your account password on supported devices.
Passkeys offer a simpler and more phishing-resistant way to protect online accounts. Whether you use an iPhone, Android phone, Windows computer, or Google account, the setup process usually takes only a few minutes.
In this guide, you’ll learn how to set up a passkey on different devices and popular platforms, how passkeys work, and what to do if you encounter problems during setup or sign-in.
What Is a Passkey and How Does It Work?
A passkey is a digital credential that allows you to sign in to websites and applications without typing a traditional password. Instead, it uses cryptographic technology to verify your identity securely.
Unlike passwords, which can be stolen through phishing attacks or data breaches, passkeys use a pair of cryptographic keys:
- Public key: Stored by the website or service to verify your identity.
- Private key: Protected by your device, security key, or compatible credential manager and never shared with the website.
When you sign in, your device uses the private key to respond to a challenge from the website. You typically authorize this process using your fingerprint, facial recognition, or device PIN.
This means that even if someone discovers your email address, they cannot simply reuse a stolen password to access an account through its passkey authentication method.
Passkeys also work with technologies such as FIDO2 and WebAuthn, which help prevent phishing by associating credentials with legitimate website domains.
For users exploring different authentication technologies, our guide to Microsoft Authenticator passwordless sign-in explains another approach to accessing accounts without traditional passwords.
Read more: How to Use a Password Manager: Your First Week with a Vault
Secure your accounts with fast, reliable two-factor authentication. Download now and protect your login in seconds.Download Authenticator App
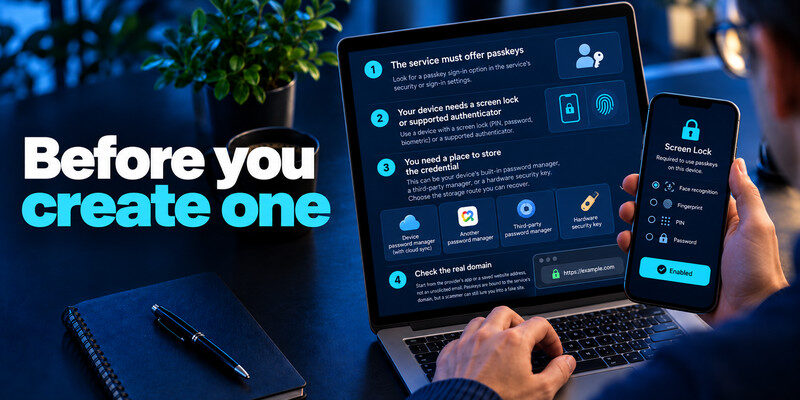
What Do You Need Before Setting Up a Passkey?
Before learning how to set up a passkey, make sure your device, browser, and account meet the necessary requirements.
A Compatible Device
Most modern smartphones and computers support passkeys, including:
- iPhones and iPads running supported versions of iOS or iPadOS.
- Android phones and tablets with passkey-compatible software.
- Mac computers with supported macOS versions.
- Windows computers with Windows Hello or another compatible passkey provider.
Older devices may require operating system updates or a different authentication method.
A Screen Lock or Biometric Authentication
Your device should have at least one secure unlocking method enabled:
- Face ID or facial recognition
- Touch ID or fingerprint recognition
- Device PIN
- Device password or supported screen-lock pattern
These methods authorize the use of your passkey. Your fingerprint or facial image is not sent to the website.
A Passkey-Compatible Account
Not every website supports passkeys. You must use an account or application that provides a passkey creation option.
Examples of services offering passkey support include Google, Microsoft, PayPal, and other major online platforms.
A Secure Place to Store Passkeys
Depending on your device, you may save passkeys through:
- Apple Passwords and iCloud Keychain
- Google Password Manager
- Windows Hello or a compatible Windows passkey provider
- A supported third-party password manager
- A FIDO2-compatible hardware security key
Choose a storage method that you can access and recover if you replace or lose your device.
Important: Passkeys are not automatically interchangeable with one-time authentication codes. An authenticator app may help protect accounts that support TOTP-based two-factor authentication, but it should not be assumed to store passkeys unless that feature is explicitly supported.
Read more: What Is a Password Manager? A Plain-English Guide to Vaults and AutoFill
How to Set Up a Passkey on Any Supported Account
Although the interface varies between websites, the general process for creating a passkey is similar across most services.
Follow these steps to set up a passkey for an existing account.
Step 1: Sign In to Your Account
Open the official website or application where you want to enable passkey authentication.
Sign in using your existing password or another supported authentication method.
Make sure you are using the legitimate website rather than a link from an unexpected email or message.
Step 2: Open Security Settings
Navigate to your account settings and look for a section labeled:
- Security
- Sign-in and Security
- Login Methods
- Password and Authentication
- Passkeys
Some services place passkey settings under two-factor authentication or advanced security options.
Step 3: Select Create a Passkey
Find the option labeled Create a passkey, Add passkey, or Set up passkey.
Select it to begin the registration process.
Your browser, operating system, or credential manager should display a confirmation window asking where to save the credential.
Step 4: Verify Your Identity
Complete the requested device verification.
Depending on your device, you may need to:
- Scan your fingerprint.
- Confirm with Face ID.
- Enter your device PIN.
- Unlock your hardware security key.
This verification authorizes the creation of your passkey.
Step 5: Save and Confirm Your Passkey
After verification, the service should confirm that your passkey was created successfully.
Some websites also allow you to name the credential so you can identify the device or security key associated with it.
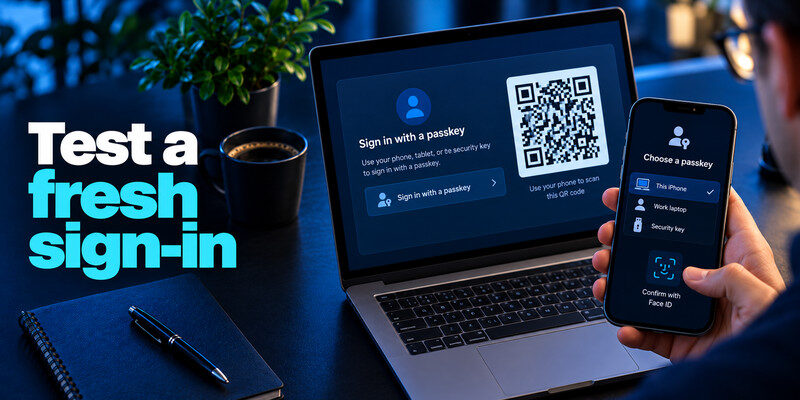
Step 6: Test Your Passkey
Sign out of your account and return to the official login page.
Select Sign in with a passkey or the equivalent option.
Confirm the sign-in request using your device’s authentication method.
If you can access your account successfully, your passkey is working.
Tip: Keep your existing account recovery options enabled until you have tested your new passkey and confirmed how to recover access if your device becomes unavailable.
Read more: Is It Safe to Store Passwords in One App? A Practical Risk Assessment
How to Set Up a Passkey on Google
Google allows users to create passkeys for supported Google Accounts, making it possible to sign in without entering a password in many situations.
If you want to know how to set up a passkey specifically for Gmail, YouTube, or other Google services, follow these instructions.
Step 1: Open Your Google Account
Visit Google Account Security and sign in to the account you want to protect.
Step 2: Find Passkeys and Security Keys
In the security settings, locate Passkeys and security keys. Depending on the interface, this may appear under the section for signing in to Google.
Google may ask you to verify your identity before continuing.
Step 3: Create a New Passkey
Select Create a passkey if the option is available.
Google will display a prompt asking you to save the credential using a compatible device, password manager, or security key.
Step 4: Confirm With Your Device
Use your fingerprint, face recognition, or screen-lock PIN to authorize passkey creation.
Wait until Google confirms the registration.
Step 5: Sign In Using Your Passkey
Return to Google’s login page and enter your email address if requested.
Choose the passkey sign-in option and complete device verification.
You should now be able to access your Google Account without manually entering your password for that supported sign-in flow.
For additional protection, you can also review Google Account two-step verification to understand how Google handles other authentication methods.
Note: Creating a Google passkey does not necessarily remove your account password or disable existing recovery methods. Review your account security settings before making changes.
Read more: How to Create a Strong Master Password You Can Still Remember
How to Set Up a Passkey on iPhone or iPad
Apple devices support passkeys through their built-in credential management system.
If you’re wondering how to set up a passkey on an iPhone, you generally do so while registering or updating an account on a supported website or application.
Step 1: Prepare Your iPhone
Make sure your iPhone is running a compatible version of iOS and that you have configured Face ID, Touch ID, or a device passcode.
If you plan to use Apple’s synchronized passkey storage, ensure that iCloud Keychain or the appropriate Passwords synchronization settings are enabled.
Step 2: Open a Website That Supports Passkeys
Launch Safari or another compatible browser.
Visit the website where you want to create a passkey and sign in to your account.
Step 3: Find the Passkey Option
Open the website’s account security settings.
Select Create a passkey or Add passkey.
Your iPhone should display a system prompt offering to save the passkey.
Step 4: Confirm With Face ID or Touch ID
Approve the request using Face ID, Touch ID, or your device passcode.
Your passkey will be saved through the selected compatible credential provider.
Step 5: Use the Passkey to Sign In
The next time you access the website, choose the passkey login option.
Your iPhone can authenticate you using its configured unlocking method without requiring you to type the account password.
If you’re interested in other security features available on Apple devices, read our guide to Apple authentication options.
Important: A passkey for a third-party website is different from the authentication methods used to secure your Apple Account itself.
Read more: Microsoft Authenticator Apple Guide for iPhone

How to Set Up a Passkey on Android or Samsung
Android smartphones can create and store passkeys using Google Password Manager or another compatible credential provider.
Samsung Galaxy devices also support passkey creation through compatible apps, browsers, and credential management services, including Samsung Pass where supported.
Step 1: Update Your Device
Make sure your Android operating system, browser, and credential management software are updated.
Enable a secure screen lock if you have not already done so.
Step 2: Open a Supported Account
Launch Chrome or another compatible browser and sign in to the website where you want to enable passkeys.
Navigate to its security settings.
Step 3: Choose Create a Passkey
Select the option to create a passkey.
Your Android device should display a credential-saving prompt.
Depending on your device configuration, you may be able to choose Google Password Manager, Samsung Pass, or another supported provider.
Step 4: Verify Your Identity
Confirm the request using your fingerprint, facial recognition, PIN, or another supported screen-lock method.
Step 5: Complete Registration
Wait for the website to confirm that your passkey has been created.
You can then return to the login page and test passwordless sign-in.
Can You Use a Passkey Across Android Devices?
Yes, in many cases.
If your passkey is stored in a synchronized credential manager, it may become available on other compatible devices signed in to the same manager account.
However, passkeys stored only on a specific device or hardware key may not synchronize automatically.
Read more: Changing Two Factor Authentication Apple: What You Need to Know
How to Set Up a Passkey on Windows
Windows supports passkey authentication through Windows Hello and compatible credential providers.
To set up a passkey on a Windows computer, follow these steps.
Step 1: Configure Windows Hello
Open Windows Settings and navigate to Accounts > Sign-in options.
Configure a supported Windows Hello method, such as:
- Facial recognition
- Fingerprint recognition
- Windows Hello PIN
Step 2: Open a Supported Website
Launch a compatible browser such as Microsoft Edge or Chrome.
Sign in to the website where you want to register a passkey.
Step 3: Create the Passkey
Open the website’s security settings and select the passkey creation option.
When Windows displays a passkey prompt, choose an available storage method.
Step 4: Confirm With Windows Hello
Enter your Windows Hello PIN or use the configured biometric method.
The website should confirm that your passkey was registered.
Step 5: Test Passwordless Sign-In
Sign out, reopen the website, and select the passkey sign-in option.
Complete the Windows Hello verification to access your account.
Users who want to learn more about Microsoft’s authentication ecosystem can explore Microsoft Authenticator passkeys.
Note: Some Microsoft work or school accounts have additional administrator-controlled passkey requirements. Their setup process may differ from personal accounts.
How to Set Up a Passkey for PayPal
PayPal is another service that supports passkey authentication for eligible accounts and devices.
The exact setup options depend on your account, region, device, and current PayPal interface.
Step 1: Sign In to PayPal
Open the official PayPal website or mobile application.
Sign in using your existing credentials.
Step 2: Open Security Settings
Navigate to your account’s security or login settings.
Look for the passkey management option if it is available for your account.
Step 3: Create Your Passkey
Select the option to create a passkey.
Follow the instructions displayed by PayPal and your device.
Step 4: Verify and Save
Confirm the request using your device’s biometric authentication or screen lock.
After successful registration, PayPal should associate the new passkey with your account.
Step 5: Test Your Login
Sign out and attempt to log in again using the passkey option.
If the option is unavailable, check whether your account and device currently support it.
You can also learn about additional account protection methods in our guide to PayPal two-factor authentication.
How to Sign In With a Passkey on Another Device
After learning how to set up a passkey, you may want to use it on a laptop, tablet, or computer where the credential is not stored.
There are two common approaches.
Method 1: Use a Synced Passkey
If your credential manager supports synchronization, sign in to the same manager on another compatible device.
Once synchronization is complete, the passkey may appear automatically when you visit the supported website.
Select the passkey and complete the required device verification.
Method 2: Use a Passkey From Your Phone
Some websites allow you to authenticate on a computer using a passkey stored on your smartphone.
- Open the website’s login page on your computer.
- Select Sign in with a passkey.
- Choose the option to use another device or phone.
- Scan the displayed QR code with your smartphone if prompted.
- Follow the phone’s authentication instructions.
- Approve the sign-in request using your fingerprint, face recognition, or PIN.
For this cross-device method, the phone and computer may need Bluetooth enabled and must satisfy the proximity requirements of the authentication flow.
Your passkey remains protected by your phone or credential provider rather than being copied to the computer simply because you used a QR code.
Read more: What Is Authenticator App? How It Works, How to Use It, and Why It Matters
Passkey vs. Password vs. Authenticator App
Understanding the differences between these authentication methods can help you choose the right security approach.
| Feature | Passkey | Password | Authenticator App (TOTP) |
|---|---|---|---|
| Main purpose | Passwordless authentication | Account authentication | Additional verification |
| What users enter | Device verification | Password | One-time code |
| Phishing resistance | Strong, domain-bound | Low | Limited |
| Shared secret with website | No reusable private key | Password-based secret | TOTP enrollment secret |
| Typical storage | Device or credential manager | Memory or password manager | Authenticator app |
| Cross-device use | Depends on storage and sync | Usually possible | Depends on backup and transfer |
Passkeys provide strong protection against credential phishing because they are associated with legitimate website domains.
Traditional passwords can be stolen, reused, or exposed through compromised databases.
Authenticator apps generally provide an additional security layer by generating time-based one-time passwords.
For a deeper comparison, read SMS vs. authenticator app and our explanation of TOTP authenticator apps.
Do You Still Need Two-Factor Authentication With a Passkey?
A passkey that requires device-based user verification combines possession of the credential with local verification, such as a PIN or biometric authentication.
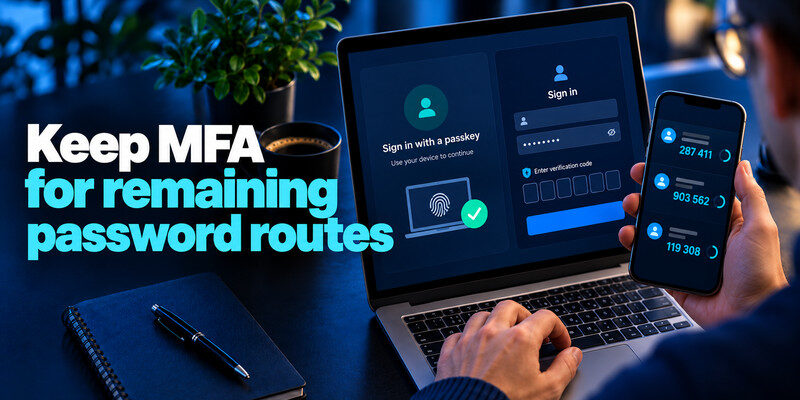
However, some websites continue to offer passwords, SMS codes, or authenticator-based verification as alternative sign-in methods.
If you still use password-based accounts, enabling an authenticator app for two-factor authentication can provide additional protection where TOTP is supported.
Remember that a TOTP authenticator is not automatically a passkey manager. These technologies serve different authentication purposes.
How to Fix Common Passkey Setup Problems
Even after following the correct steps, you may encounter problems when creating or using a passkey.
Here are the most common issues and how to resolve them.
The Create Passkey Option Is Missing
If you cannot find the passkey setting:
- Confirm that the website supports passkeys.
- Update your browser and operating system.
- Check whether passkeys are available for your account type.
- Try the service’s official mobile application.
- Check whether an organization administrator restricts passkey enrollment.
Not all services provide passkeys to every account or platform.
Your Device Does Not Support Passkeys
Older operating systems and browsers may lack the necessary authentication features.
Update your device software and check whether a supported credential manager or hardware security key can be used.
If the device remains incompatible, use another supported device or the service’s existing authentication method.
Fingerprint or Face Recognition Is Not Working
If biometric verification fails:
- Check that the biometric feature is enabled.
- Restart your device if necessary.
- Try your device PIN or password when offered.
- Verify that your screen-lock settings are functioning.
A biometric failure does not necessarily mean the passkey itself is damaged.
Passkey Is Not Showing Up During Login
A missing passkey may indicate that it was saved in a different credential manager, browser profile, or device.
Check the account used by your credential manager and confirm that synchronization is enabled where applicable.
You should also verify that you are signing in to the same website and user account for which the passkey was created.
Passkey QR Code Is Not Working
If cross-device authentication fails:
- Make sure both devices support the required authentication method.
- Enable Bluetooth when required.
- Keep the devices near each other.
- Check your internet connection.
- Try generating a new QR code.
- Use another supported browser if necessary.
Avoid scanning unexpected passkey-related QR codes received through suspicious messages.
Passkey Stops Working After Changing Phones
Whether your passkey transfers to a new phone depends on how it was stored.
If it was synchronized through a compatible credential manager, signing in to that manager may restore access.
If it was stored only on the previous device, you may need another registered passkey or the account provider’s recovery process.
Do not erase or trade in your old device until you have confirmed that you can sign in successfully on the new one.
What Happens If You Lose a Device With Your Passkey?
Losing your phone or computer does not always mean losing access to every account protected by a passkey.
Your recovery options depend on where the credential was stored and which backup methods the service supports.
Recover a Synced Passkey
If your passkey was saved through a supported synchronization service, you may be able to access it on another device after recovering your credential manager account.
For example, a passkey stored in a compatible cloud-synchronized manager may become available after you complete the manager’s sign-in and recovery requirements.
Use Another Registered Passkey
Some websites allow multiple passkeys to be associated with the same account.
If you registered a second device or security key, you can use it to regain access.
Use Account Recovery
If no passkey is available, follow the official recovery procedure provided by the website.
Depending on the service, recovery may involve an existing password, recovery email, backup code, or another verification method.
Remove Lost Devices
Once you regain access, review the list of registered passkeys and devices.
Remove credentials associated with lost, stolen, or unrecognized devices when appropriate.
Then register a new passkey and verify that your recovery methods are up to date.
Best Practices for Keeping Your Passkeys Secure
Learning how to set up a passkey is only the first part of maintaining a secure account. Proper credential management is equally important.
Use a Trusted Credential Manager
Choose a supported passkey provider with security and recovery features appropriate for your needs.
Protect access to the credential manager because it may store authentication credentials for multiple accounts.
Register a Backup Authentication Method
Where supported, create a second passkey or maintain another trusted recovery method.
This reduces the risk of being locked out if your primary device is lost or damaged.
Protect Your Device
Enable a strong screen lock and keep your operating system updated.
Do not share your device PIN or approve unexpected authentication requests.
Review Your Account Recovery Settings
Check which alternative sign-in methods remain active.
If your account still accepts a traditional password, use a strong, unique password and enable appropriate additional security measures.
Avoid Suspicious Login Requests
Although passkeys are resistant to phishing through fake login domains, attackers can still attempt other scams.
Never share recovery codes or approve unexpected account changes simply because someone claims to represent a legitimate service.
Frequently Asked Questions About Passkey Setup
How do I set up a passkey for the first time?
Sign in to a website that supports passkeys, open its security settings, select Create a passkey, and confirm the request using your device’s fingerprint, face recognition, or PIN. Save the credential and test a new sign-in to ensure it works.
Is it free to create a passkey?
Creating a passkey is generally free on supported websites and devices. However, some third-party credential managers may charge for additional features, and hardware security keys must usually be purchased separately.
Can I set up a passkey without a fingerprint?
Yes. Many passkey systems support device PINs or passwords instead of biometric authentication. The available verification methods depend on your operating system and credential provider.
Can I use the same passkey on multiple devices?
Yes, if your passkey is stored in a compatible credential manager that supports synchronization. You may also be able to sign in on another device using a nearby phone or register separate passkeys for the same account.
Does creating a passkey remove my password?
Not necessarily. Many services continue to support password sign-in or recovery after a passkey is created. Check the website’s account security settings to understand which methods remain available.
Is a passkey safer than a password?
Passkeys generally provide stronger resistance to phishing and password reuse attacks. However, overall account security still depends on device protection, credential manager security, and any alternative login or recovery methods.
Can I create a passkey on a Samsung phone?
Yes. Compatible Samsung Galaxy devices support passkey registration through supported applications, browsers, and credential providers. The exact steps depend on the device software and the website offering passkey authentication.
What happens if I delete a passkey?
Deleting a passkey may prevent you from using that credential to sign in. If you have no other registered passkey or recovery method, you could lose account access. Verify your alternatives before deleting a working credential.
Do I need an authenticator app if I use passkeys?
Not necessarily for accounts that support passkey authentication. However, an authenticator app remains useful for services that require TOTP-based two-factor authentication or do not offer passkeys.
Final Thoughts
Understanding how to set up a passkey can help you move away from traditional passwords and adopt a more convenient, phishing-resistant authentication method.
The general process is straightforward: open your account security settings, create a passkey, verify your identity using your device, and test your new login method.
Whether you’re using Google, an iPhone, Android, Samsung, Windows, or PayPal, the most important step is ensuring that your passkey is stored securely and that you have a reliable recovery option.
For accounts that have not yet adopted passkeys, consider using a two-factor authentication app to add another layer of security to password-based sign-ins.