
Google Passkey Setup Guide: How to Set Up Google Passkeys in 2026
Published November 5, 2026

To set up a Google passkey, open your Google Account, navigate to Security & sign-in → Passkeys and security keys, select Create a passkey, and confirm your identity using your fingerprint, face recognition, or device PIN. Once configured, you can sign in without typing your Google password.
This google passkey setup guide explains how to create passkeys on Android, iPhone, Windows, and Mac, manage existing credentials, and resolve common authentication problems.
Passkeys offer a more secure alternative to traditional passwords because they use public-key cryptography and are designed to resist phishing attacks.
According to the FIDO Alliance’s Passkey Index 2026, passkey authentication achieved a 93% success rate compared with 78% for traditional multi-factor authentication across participating services.
Whether you are setting up your first passkey or troubleshooting an existing one, this google passkey setup guide covers the essential steps for protecting your Google Account.
1. Google Passkey Setup Guide: What Are Google Passkeys?
A Google passkey is a digital credential that lets you sign in to your Google Account without entering a traditional password.
Instead, you verify your identity using a trusted device and an authentication method such as Face ID, fingerprint recognition, or a screen-lock PIN.
Unlike passwords, passkeys use public-key cryptography.
When you create a passkey, two cryptographically related keys are involved:
- Public key: Registered with the website or service.
- Private key: Protected by your device, security key, or passkey provider.
During authentication, your authenticator uses the private key to sign a challenge. Google verifies that response using the public key.
Your private key is not sent to Google during the sign-in process.
This design makes passkeys resistant to many credential phishing attacks.
Why Should You Use Google Passkeys?
The primary benefits include improved security, faster authentication, and reduced reliance on passwords.
1. Stronger phishing protection
Passkeys are associated with the legitimate website’s identity. A fraudulent website using a different domain cannot normally request a valid authentication response for Google’s domain.
2. Faster sign-in
Users can authenticate by unlocking their device instead of remembering and entering complex passwords.
3. Protection against password reuse
Passkeys do not rely on reusable account passwords, reducing the risks associated with stolen or recycled credentials.
4. Convenient cross-device access
Compatible passkey providers can synchronize credentials across supported devices. Users can also authenticate on a computer using a passkey stored on their phone.
According to Google’s October 8, 2026 article, How to Set Up a Google Account Passkey, biometric information such as fingerprints or facial scans remains on the device and is not shared with Google during passkey authentication.
Are Google Passkeys Completely Secure?
Passkeys significantly reduce phishing and password-related risks, but no authentication method guarantees complete account protection.
A compromised device, stolen authenticated session, or weak recovery process may still create security problems.
Only register passkeys on devices you personally own and trust.
For additional background, read our FIDO Google authentication guide to understand the standards behind phishing-resistant authentication.
2. Google Passkey Setup Guide: Requirements Before You Start
Before creating a passkey, verify that your device, operating system, browser, and security settings meet Google’s requirements.
This step is important because some users experience setup errors simply because their devices do not support the necessary authentication features.
Supported Devices and Operating Systems
According to Google Account Help, the following minimum requirements apply:
| Device | Minimum requirement |
|---|---|
| Android smartphone | Android 9 or later |
| iPhone or iPad | iOS 16 or later |
| Windows computer | Windows 10 or later |
| Mac | macOS Ventura or later |
| Chromebook | ChromeOS 109 or later |
| Physical security key | FIDO2-compatible hardware |
Supported browsers include Chrome 109+, Safari 16+, Edge 109+, and Firefox 122+.
Using the latest available operating system and browser version is recommended for compatibility and security.
Enable Device Screen Lock
Passkeys rely on a secure way to verify that the person attempting to sign in is authorized to use the device.
Before starting the google passkey setup guide, make sure you have enabled an appropriate screen lock.
Depending on your device, this may include:
- Fingerprint recognition.
- Face recognition.
- A device PIN.
- A supported screen-lock password or pattern.
For Apple devices, ensure iCloud Keychain is enabled if you intend to use Apple’s built-in passkey storage and synchronization.
If you plan to use your phone’s passkey to sign in on another computer, turn on Bluetooth and follow the cross-device authentication instructions.
Check Your Google Account
Make sure you can access your Google Account before creating a passkey.
Google may ask you to verify your identity using your existing authentication method.
For managed Google Workspace accounts, passkey availability may depend on organizational settings.
Do not create passkeys on public computers or shared devices. Anyone who can unlock a device containing your passkey may potentially access your account.
3. How to Set Up a Google Passkey Step by Step
If you are searching for how to setup passkey for google account, the general process is straightforward.
You can complete most of the setup directly from Google Account security settings.
Step 1: Open Your Google Account Security Settings
Sign in to the Google Account you want to protect.
Open your account settings and navigate to:
Security & sign-in → Passkeys and security keys
Google may request an additional verification step before displaying the available authentication settings.
Step 2: Select Create a Passkey
Locate the passkey management section.
Click or tap Create a passkey.
Google will begin the registration process using the compatible authenticator available on your device.
Depending on your browser and operating system, you may see options to save the passkey in a system credential manager, supported password manager, or hardware security key.
Step 3: Verify Your Identity
Follow the authentication prompt displayed on your device.
You may be asked to use:
- Face ID or facial recognition.
- Fingerprint authentication.
- A device PIN.
- Your device’s supported screen-lock method.
This verification authorizes the authenticator to create the credential.
Your fingerprint or facial biometric data is not uploaded to Google as part of the passkey authentication process.
Step 4: Complete Passkey Registration
Approve the creation request and wait for the confirmation.
After successful registration, your passkey should appear among your Google Account’s available sign-in credentials.
The exact confirmation message depends on your operating system, browser, and passkey provider.
Step 5: Test Passwordless Sign-In
Sign out of your Google Account and return to the sign-in screen.
Enter your email address and select the available passkey option.
Unlock your device when prompted.
If the authentication succeeds, your account opens without requiring you to type your traditional password.
This completes the basic process to setup passkey for google account.
One important detail: creating a passkey does not necessarily remove your existing password or account recovery methods.
Google may also impose a security waiting period before a newly registered passkey can be used for certain sign-ins.
This google passkey setup guide recommends testing the new credential while keeping a reliable recovery method available.
4. Google Passkey Setup Guide for Android and iPhone
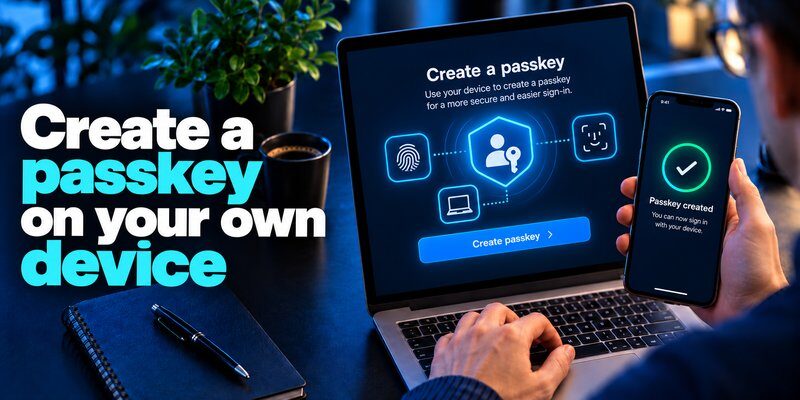
Google passkey registration is supported on both major smartphone platforms, but the device settings and credential providers differ.
The following instructions explain the process for each operating system.
Google Passkey Setup Android: Step-by-Step Instructions
To setup google passkey on android, follow these steps:
- Open a compatible browser on your Android device.
- Sign in to your Google Account.
- Navigate to Security & sign-in.
- Open Passkeys and security keys.
- Select Create a passkey if the option is available.
- Confirm the registration using your fingerprint, face unlock, PIN, or supported screen lock.
- Check that your passkey appears in your Google Account settings.
Important: Google may automatically register a passkey for an eligible Android device already signed in to your account.
If a passkey already appears, you may not need to create another one.
Where Are Android Passkeys Stored?
On compatible Android devices, passkeys can be stored and synchronized through Google Password Manager or another supported credential provider.
The exact storage location depends on your device configuration.
To review available credential providers, open your Android settings and search for Passwords, passkeys & accounts.
You can then inspect the enabled password manager and passkey-related settings.
Google Password Manager can synchronize supported passkeys across devices associated with the appropriate account.
However, avoid assuming that every registered passkey automatically synchronizes to every device.
This google passkey setup guide recommends testing authentication on each device you regularly use.
Setup Google Passkey on iPhone
To setup google passkey on iphone, ensure your device runs iOS 16 or later.
Follow these instructions:
- Open Settings on your iPhone.
- Confirm that Face ID, Touch ID, or a device passcode is enabled.
- Enable iCloud Keychain if you plan to use Apple’s credential storage.
- Open a compatible browser and access your Google Account.
- Navigate to Security & sign-in → Passkeys and security keys.
- Choose Create a passkey.
- Confirm the request using Face ID, Touch ID, or your device passcode.
- Check that the registration completed successfully.
Your Google passkey may be saved through Apple’s built-in credential system or another supported passkey manager, depending on your settings.
You do not need to install a separate Google Authenticator application to create a Google passkey.
Passkeys and time-based verification codes serve different authentication purposes.
For readers interested in Apple’s available authentication tools, our apple authenticator guide discusses relevant security options.
Can You Use an iPhone Passkey on a Windows Computer?
Yes.
Google supports cross-device authentication using compatible smartphones.
When signing in to Google on a Windows computer:
- Enter your Google Account email address.
- Select Try another way if the desired passkey is not offered automatically.
- Choose Use your passkey.
- Select the option to authenticate with another device.
- Scan the displayed QR code using your phone.
- Enable Bluetooth when required.
- Approve the request using your phone’s biometric authentication or device PIN.
The passkey remains protected by your authenticator during this process.
This option is particularly useful when accessing Google services from multiple personal devices.
5. Set Up Google Passkeys on Windows, Mac, and 1Password
Desktop users can also benefit from passwordless authentication.
This section of the google passkey setup guide covers computer-based registration and third-party passkey management.
How to Create a Google Passkey on Windows
On Windows 10 or later, open a supported browser and sign in to your Google Account.
Navigate to the passkey management settings and choose Create a passkey.
Depending on your system and browser, Windows may offer compatible authentication options such as Windows Hello or another available passkey provider.
Follow the device verification prompt and complete registration.
For the most reliable experience, use updated software and a properly configured device security method.
How to Create a Google Passkey on Mac
For macOS Ventura or later:
- Ensure your Mac has the required software updates.
- Enable a supported device authentication method.
- Check that iCloud Keychain is enabled if using Apple’s passkey storage.
- Open Safari or another supported browser.
- Access your Google Account’s passkey settings.
- Select Create a passkey.
- Approve the request using the offered authentication method.
If your Mac supports Touch ID, you may be able to use it during authentication.
Otherwise, the system may request your Mac login password or another supported verification method.
Users researching google authenticator for mac should remember that a TOTP authenticator and a passkey provider are not the same tool.
How Does 1Password Work With Google Passkeys?
The phrase 1password google passkey commonly refers to using 1Password as the credential manager for a Google Account passkey.
1Password supports storing and using passkeys on compatible platforms.
To use it:
- Install and configure a supported version of 1Password.
- Enable its browser extension or supported operating-system credential integration.
- Open your Google Account’s passkey settings.
- Start the passkey creation process.
- Choose 1Password as the credential provider when that option is available.
- Save the new passkey to the appropriate 1Password vault.
- Test the saved passkey during your next sign-in.
The available provider choices depend on your browser, operating system, and configuration.
Saving a passkey in a password manager does not mean that the manager receives your Google Account password or biometric data.
For broader information, read our guide on how to use a password manager.
6. How to View, Manage, and Remove Google Passkeys
After registration, managing your passkeys is essential for long-term account security.
This part of the google passkey setup guide explains how to inspect registered credentials and remove ones you no longer trust.
How to View Google Passkeys
To view google passkeys, follow these steps:
- Sign in to your Google Account.
- Open Security & sign-in.
- Select Passkeys and security keys.
- Complete identity verification if requested.
- Review the listed passkeys and registered security keys.
Some Android devices may already appear because Google automatically created passkeys for eligible signed-in devices.
If you use multiple Google Accounts, make sure you are viewing the correct account.
How to Remove an Existing Passkey
If you no longer use a device, you should review its associated credentials.
For manually created passkeys:
- Open your Google Account security settings.
- Select Passkeys and security keys.
- Find the passkey associated with the device.
- Select the credential.
- Choose Remove when available.
Removing a passkey does not automatically sign out every existing session.
If your device was lost or stolen, also review signed-in devices, terminate suspicious sessions, and follow Google’s account security recommendations.
Automatically created Android passkeys may have different management procedures from manually registered credentials.
You may need to remove the relevant device from your account’s trusted devices or signed-in device list.
What Happens If You Delete a Passkey?
Deleting a passkey prevents the associated credential from being used for future authentication, once it is no longer accepted by the account.
However, it does not necessarily delete your Google Account or remove every alternative sign-in method.
If a synced passkey is stored through a third-party manager, you may need to manage both the Google Account registration and the stored credential separately.
Always confirm that another trusted sign-in or recovery method remains available before removing your only working passkey.
7. Google Passkey Setup Guide: Fix Common Problems
Even when registration is completed correctly, passkey authentication can sometimes fail.
If you search for my google passkey is not working, the underlying issue may involve device compatibility, browser settings, credential availability, or account security restrictions.
Problem 1: Google Passkey Option Is Not Showing
Possible reasons include:
- Your operating system is outdated.
- Your browser does not support the required passkey features.
- Your account is subject to administrative restrictions.
- A compatible authenticator is not available.
- You are using a browser mode that limits passkey functionality.
Solution: Update your device and browser, enable an appropriate screen lock, and review your Google Account security settings.
For managed accounts, contact the administrator responsible for authentication policies.
Problem 2: Google Passkey Is Not Working on iPhone
If your iPhone cannot create or use a passkey, first verify its iOS version.
Google requires iOS 16 or later.
Next, confirm that Face ID, Touch ID, or a device passcode is configured.
If using Apple’s credential manager, check iCloud Keychain and password autofill settings.
If another password manager is enabled, confirm which provider is handling the passkey request.
Restarting the authentication process in an updated browser may resolve temporary problems.
Problem 3: Android Cannot Find the Passkey
If Android cannot locate your credential, check whether you are signed in to the correct Google Account and whether the expected password manager is enabled.
A passkey created on one device may not be available through a different credential provider.
For Android devices, inspect the available options under Passwords, passkeys & accounts.
Do not assume a passkey is missing simply because Google does not offer to create a new one. Eligible Android devices may already have an automatically registered passkey.
Problem 4: Passkey QR Code Does Not Work
Cross-device login can fail when the devices cannot establish the required connection.
Try the following:
- Turn on Bluetooth on both devices.
- Keep the devices near each other.
- Use an updated, compatible browser.
- Scan the QR code using your phone’s camera.
- Follow the authentication prompt on the phone.
If authentication still fails, return to the Google sign-in page and choose another available method.
Problem 5: Newly Created Passkey Cannot Be Used
According to Google Account Help, a newly registered passkey may require up to seven days before it becomes available for certain sign-ins.
Google may accelerate trust establishment when another trusted passkey or physical security key is already available.
This does not mean every new passkey requires a seven-day waiting period.
Avoid repeatedly removing and recreating the credential without first checking whether the issue is a security waiting period.
Problem 6: You Lost the Device Containing Your Passkey
If your phone or computer is lost, use another trusted sign-in method to access your Google Account.
Then review registered passkeys and signed-in devices.
Remove or revoke access associated with the missing device as appropriate.
Update recovery information if necessary and inspect account activity for suspicious changes.
Our Google account two-step verification guide provides additional information about protecting account access.
Never disable account protections simply to work around a passkey error.
The safest troubleshooting approach is to maintain a reliable recovery method while investigating the problem.
8. Google Passkey Setup Guide: Security Tips and FAQs
After completing the setup process, users should understand how passkeys interact with traditional passwords, security keys, and authentication applications.
This final section of the google passkey setup guide answers common questions.
Can I Set Up a Passkey for Gmail?
Yes. If you want to setup passkey for gmail, create a passkey for the Google Account associated with your Gmail address.
Gmail uses Google Account authentication, so you do not normally need a separate Gmail-specific passkey.
A passkey registered for the Google Account can be used during supported Google sign-in flows.
The same account may also provide access to services such as Google Drive, YouTube, and Google Photos, subject to the relevant authentication requirements.
Google Passkey vs Security Key: Which Is Better?
The comparison google passkey vs security key requires an important distinction: a passkey is a credential, while a physical security key is an authenticator that can hold credentials.
A passkey may be stored through a device credential manager or on compatible FIDO2 hardware.
| Feature | Synced Passkey | Hardware Security Key |
|---|---|---|
| Credential type | Cryptographic passkey | Can store FIDO2 credentials |
| Hardware | Compatible phone or computer | Separate physical authenticator |
| Synchronization | Supported by some providers | Typically device-bound |
| Phishing resistance | Yes | Yes, with FIDO2 authentication |
| Portability | Through compatible credential providers | Carry the physical key |
| Main risk | Compromised device or credential provider | Loss or theft of the key |
| Best for | Convenient everyday access | High-security and controlled environments |
Both options can provide strong phishing resistance.
The best choice depends on your threat model, device management needs, and recovery strategy.
Can an Authenticator App Replace a Google Passkey?
Not necessarily.
A passkey and a traditional one-time-password authenticator use different authentication technologies.
A passkey uses public-key cryptography to authenticate the account.
A standard TOTP application generates temporary verification codes that can supplement password-based login.
For users maintaining accounts that still require verification codes, an Authenticator app can provide an additional security layer on supported services.
However, a TOTP app does not automatically create or store Google passkeys unless it explicitly provides compatible passkey functionality.
For additional guidance, read what is an authenticator app.
Does Google Passkey Setup Disable Your Password?
No. Creating a passkey does not automatically eliminate every other method of signing in to your Google Account.
Passkey registration generally enables a passkey-first authentication experience.
Google may still offer alternative methods depending on your account settings and the circumstances of the sign-in attempt.
Your existing password and recovery methods can remain important.
Can I Create Multiple Passkeys?
Yes. Google allows users to register passkeys on multiple compatible devices.
You can repeat the setup process on additional personally owned devices.
However, credentials synchronized through a passkey provider may already be available across compatible devices without requiring completely separate registration.
Review the available options before creating duplicates.
What If I Still Need Traditional Two-Factor Authentication?
If an account does not support passkeys, continue using strong, unique passwords and enable the strongest supported MFA method.
For compatible accounts that use time-based verification codes, you can Download authenticator app for iPhone.
An authenticator application can be useful for protecting services that have not fully adopted passwordless login.
For more information, explore our guide to setting up Google Authenticator.
Remember that traditional verification codes do not provide the same phishing resistance as properly implemented FIDO2 passkeys.
Is Google Passkey Setup Worth It in 2026?
Yes. Passkeys provide meaningful security and usability benefits for users with compatible devices.
The FIDO Alliance’s Passkey Index 2026, published on October 15, reported that 36% of successful sign-ins across participating services used passkeys, compared with 26% in the previous edition.
The same report found that passkey authentication had a 93% success rate and saved an average of 27 seconds per sign-in compared with the report’s benchmark.
These findings highlight the increasing practical value of passwordless authentication, although results vary across services and user environments.
Final Thoughts: Should You Enable Google Passkeys?
Following this google passkey setup guide is a practical way to strengthen your Google Account security without making everyday sign-in more complicated.
Google passkeys offer stronger phishing protection, eliminate the need to type a reusable password during supported sign-ins, and simplify authentication through trusted devices.
For most users, the recommended approach is straightforward:
- Enable a passkey on a personally owned compatible device.
- Configure secure device authentication.
- Maintain reliable account recovery options.
- Review registered passkeys regularly.
- Protect services that still use passwords with appropriate MFA.
Whether your goal is to setup google passkeys, secure your Gmail account, or simplify authentication across devices, passkeys are an effective improvement over password-only access.
Start with your primary Google Account, confirm that the passkey works, and keep your recovery methods secure.