
Notion 2FA Setup for Personal Accounts, Guests, and SSO
Published November 20, 2026
By the Authenticator App Team
Last updated: November 2026
Turn on Notion 2FA from your personal Settings under Account security and 2-step verification. Choose the authenticator code option, scan Notion’s setup QR, verify a fresh value, and save the backup codes. Notion requires a password for its built-in method. If your organization requires sign-in through an identity provider, set up the approved factor with that provider.
The account you use and the workspace you open can be governed by different settings. For example, you may use company SSO as a member and receive a guest invitation from a separate organization. Identify the account and prompt before you reset an authenticator, change a password, or ask the workspace owner for help.
Check Which Account Can Use Notion 2FA
Confirm the Email and the Password Requirement
Open Notion while signed in and select your name in Settings. Check the account email. If you are accustomed to opening Notion with an emailed login code, you may not have set a permanent password. Notion Help’s Account settings guide describes setting one in the same personal settings area, when the sign-in policy permits it.
Notion Help’s Two-step verification article says its built-in feature is available across plans, requires a password, and is unavailable to users in an organization that requires identity-provider login. Check these two conditions before you assume a missing button is a bug. The method should be enabled on the account that needs protection.
Identify the Service Asking for a Factor
When a company SSO button sends you to the organization’s sign-in page, that identity provider handles the challenge. A Notion 2FA entry added under a separate personal account does not answer a company prompt. Read the provider name and use the method your organization assigned.
The same mailbox can receive a Notion email login code, a company identity notification, and a guest invitation. Compare the route that opened each one. Confirm which account is active and which workspace you expect before changing credentials. When a company login works but a page remains unavailable, check the invitation and membership as a separate issue.
If a guest invitation used a different email from your usual account, open the account switcher and compare both addresses before you enable Notion 2FA. Make sure you can still reach the invited address. An accepted invite can be tied to that email even when your other account has access to a different workspace.
OPay OTP Code Help for Missing, Rejected, or Unexpected Codes
Add an Authenticator From Your Personal Settings
Find the App Code Option
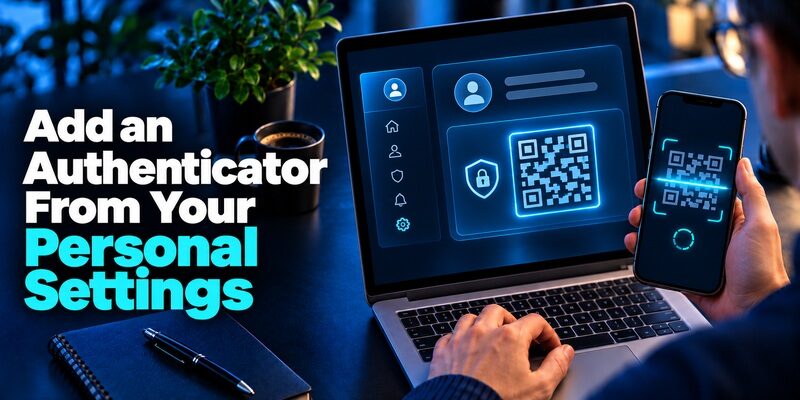
In the sidebar, go to Settings and choose your name. Under Account security, open the controls next to 2-step verification and add a verification method. Select Code from authenticator. Notion’s documentation also lists a text-message option where available. Some regions offer the app only.
Open the add-account scanner in the authenticator you intend to use. If you are setting up both a work and a personal account, pair one at a time. Check the current email before scanning. The enrollment QR links the device to the specific account in that session.
Scan the QR and Enter a Current Value
Scan the QR using the authenticator and name the method in the Notion setup flow. Use a label that distinguishes this device from a second enrolled authenticator. Enter a fresh one-time value from the newly created entry. Wait for the next code if its display is about to change.
Treat the QR as a secret. Use a trusted screen and close the enrollment when you finish. If the phone and Notion are on the same device and the app cannot scan that screen, display the official QR on a trusted computer. Avoid sharing or saving a QR image for convenience.
Confirm the Method Before Closing the Settings
When the code verifies, return to Account security and check the method you added. Keep the current session open while you save the backup codes. An authenticator entry can generate values even if Notion did not accept the pairing. A successful challenge and the verified setting together show that the Notion 2FA enrollment completed.
For compatible QR setup, can store the account’s rotating entry. Confirm the code in Notion and use a clear name in the app. If you enroll Notion 2FA on a shared device, check who can open the code app. Use an app account or storage option you can secure independently.
If you name two different entries after the same workspace, use the email in the label as well. The workspace can change after signing in, while the app entry serves a particular account. This matters when you have a contractor login and an employee login under similar names.
Store Backup Codes Away From the Workspace

| Credential | Where it is issued | What it can do |
|---|---|---|
| Current app value | Your enrolled authenticator | Answer the current built-in app challenge |
| Text-message code | The delivery destination shown by Notion | Answer the text method where available |
| Backup code | Notion on first enrollment | Provide one-time fallback through the offered recovery screen |
| Email login code | A request for an email-based login | Verify the specific login request |
| Identity-provider proof | Your company’s SSO provider | Complete the corporate sign-in policy |
Save the Set Where You Can Reach It After Device Loss
Notion’s Two-step verification guide says it issues six one-time backup codes when you first enable the feature. Save the set in protected storage that is available without the enrolled phone. A page inside the same workspace may be inaccessible if Notion 2FA blocks your sign-in.
Label the set with the exact account email. If you have a work account and a personal account, store their sets separately. Confirm you can locate the record from another trusted device before you sign out. Keep the live codes out of a team page or any support ticket.
Use Try Another Method When the Phone Is Unavailable
On the official Notion sign-in page, enter the email and password for the account. When the two-step screen offers another method, choose the Notion 2FA backup-code option and enter one unused value. Notion’s guide says every backup code can be used once, and you can generate a new set in settings when the original set is exhausted.
After using a code, note that it has been consumed. If you can still use a second authenticator or text method, verify which one remains active. Reestablish the preferred Notion 2FA method before removing a stale entry. Confirm how you would recover the account after the next device loss.
Before you file away the Notion 2FA backup set, check that the file or printout contains all the codes and that you can find it without the enrolled phone. If your password manager asks for a second factor, test whether the independent device or recovery information for that manager remains available.
Manage More Than One Verification Device
Add a Second Authenticator When It Helps Recovery
Notion Help says you can have up to two authenticators and two phone numbers. Availability of text verification varies by region. To add another factor, open Account security, use the change-method option, and verify with an active method before enrolling a new one.
Use a label that shows which trusted device you need without including the verification value or device unlock code. If two authenticators are registered, test each one through the applicable Notion 2FA challenge. The second device is most useful when it remains reachable if the primary phone is unavailable.
Move to a Replacement Phone With the Old One Available
Keep the old phone and the backup set nearby. If your app supports transfer, follow its own procedure, then verify the restored entry through Notion. If you are adding a separate method instead, confirm a code from the new device before removing the older method in Notion.
Do not assume uninstalling an app removes its enrollment on the account. Use Notion’s method controls to delete the method you no longer use. If you have a second working authenticator, check the labels carefully so you remove the retired device. Reopen settings and test again when the change is complete.
If a phone was stolen and a second method still works, open Notion directly on a trusted device. Review the settings for the missing method and remove it after confirming the replacement. Check account sessions through the official controls. A removed authenticator and a terminated browser session address different forms of access.
Separate Notion Passkeys From App Verification

Create the Credential Through Notion’s Passkey Settings
Notion Help’s Passkeys guide describes creating a passkey under Account security for eligible accounts. It uses the device or credential manager you choose. The sign-in can be tied to the official verifier and confirmed through a device unlock. Check which credential manager will make the passkey available on another device.
An account that requires sign-in through an identity provider uses that provider’s approved methods. Ask your IT team which passkey option applies there. If your personal account has both a passkey and Notion 2FA, keep a record of the sign-in method and what you can use when the primary device is lost.
Recognize the Login Prompt You Started
A code field after a password asks for a current value or another proof shown by Notion. A passkey prompt appears through the device’s credential system. An email login code comes from a separate request. Read the actual field or device dialog before opening your authenticator.
If a new phone opens Notion through an existing company sign-in, that result can differ from an email-and-password test for your personal account. Keep the initial session available and test only the paths you are authorized to use. Confirm which workspace and account name appear after each test.
If you use a passkey manager on multiple platforms, confirm where its credentials sync and which devices can unlock them. An iPhone moving to Android can change the account that manages passkeys. Keep your Notion 2FA backup record available while testing the new sign-in path and check that the intended profile opens.
Passwordless Multi Factor Authentication With Passkeys and Security Keys
Apply the Correct Policy for Members and Guests

| Workspace situation | Who sets the rule | Where to look first |
|---|---|---|
| Personal account uses a password | The account holder | Personal Account security |
| Organization requires SAML SSO | The organization and its identity provider | The company sign-in and support route |
| Enterprise guest access requires MFA | The Notion organization owner | Guest access requirements and the invited account |
| Guest opens a page with another email | The invited account’s access and workspace sharing settings | The invite address and account switcher |
Follow the Identity Provider for Required SSO
Notion Help’s SAML SSO guide explains that Business and Enterprise workspaces can use a configured provider. If the workspace requires it, complete the provider’s MFA process. Use the organization support route if the provider account is locked or a factor is missing. Check the provider name when the same email domain offers more than one choice.
Notion’s own account verification and the provider’s sign-in policy are separate settings, even when the team calls both Notion 2FA. Test the organization route from the official Notion login or the approved company portal. If an administrator has recently changed the policy, share which route and account you used when you report a problem.
Check Enterprise Guest Enforcement and the Invite Address
Notion’s MFA enforcement guide says Enterprise organization owners can require MFA for guests. It describes managing the requirement at the organization level for eligible workspaces. The Two-step verification FAQ says that this guest feature is separate from requiring built-in Notion 2FA for members.
A guest may use a different sign-in method from employees. Notion’s SAML guide says invited page guests use another route, such as email and password or a supported social sign-in. Confirm the email that received the invitation. Ask the host which workspace requirement is in effect before changing your existing account.
An Enterprise owner can test the experience with an authorized guest before applying a rule broadly. Invite the guest through the ordinary sharing flow, confirm the invited email, and observe when the access restriction appears. Record the support contact and instructions the guest can open without reaching the blocked Notion page.
Diagnose a Missing Setup Button or Rejected Code
Confirm Account Eligibility Before Reinstalling
If you cannot find the add-method option, open personal settings instead of the workspace’s settings. Check whether you have a password and whether your organization requires an identity provider. Compare the email and account type with what Notion Help describes. If your region only supports app codes, the text option can be absent.
If your sign-in screen offers no Notion 2FA challenge, confirm whether you are already in an authenticated session, using a passkey, or following SSO. A successful sign-in under one route says little about another. Check the recorded method from the official settings while you still have access.
Verify the Entry Name and the Phone’s Clock
For a rejected rotating value, choose the correct Notion entry, set the phone’s date and time automatically, and wait for a fresh code. Use the full value as displayed. If it fails, consider whether the entry came from an older enrollment or another account with the same label.
If the authenticator and phone are gone, use a backup code where offered and verify a replacement. If none of the active methods works, use Notion’s official support. In a company SSO flow, contact the identity support team. Include the affected email and stage of the error, without sending recovery values.
Test the Login Before You Need It

Keep a Known Working Session During the Test
In a trusted second browser profile, sign in through the route you normally use. Confirm the prompt belongs to the intended account. Complete the challenge, then open the expected workspace and a page you already have permission to use. This distinguishes verification from a separate sharing problem.
When preparing for a phone change, check the old and new devices against the same login. A familiar workspace can remain open in an app after the new browser is still blocked. Verify the fresh Notion 2FA challenge while the old device remains under your control.
Record the Recovery Path for Each Role
A practical account record lists the sign-in route, the device used for the factor, and the location of the backup set. A team should also record whether company IT or the workspace host can help a member or guest. Store that record somewhere an authorized person can reach without first logging into the affected Notion workspace.
Review the record after you change a work email, retire a device, or accept an invite with a different address. When a new login notification arrives unexpectedly, open Notion directly and use its official device and account controls. Follow the company’s separate incident process if the request belongs to an SSO account.
When you prepare for a trip, check whether you can reach the device that holds each method and the protected backup location. A rotating app value can appear offline, but Notion still needs a connection to verify it. Keep the Notion 2FA recovery procedure available for the device and account you actually travel with.
Final Thoughts
Set up Notion 2FA in your personal account when its sign-in policy supports it. Verify the new app entry, store the backup set separately, and test a fresh login to the intended workspace. For company SSO or an Enterprise guest requirement, identify the team or service that controls the specific challenge.
Download Authenticator App
Secure your accounts with fast, reliable two-factor authentication. Download now and protect your login in seconds.