
Authenticator App iPhone Guide to Codes Setup and Recovery
Published November 16, 2026
By the Authenticator App Team
Use Apple Passwords for built-in verification codes on iPhone, or choose a dedicated authenticator for compatible accounts you want to manage separately. For a work or school account, use the app or factor the organization requires. Start with the account’s official security settings. A compatible app needs the service’s setup information before it can generate a code that the service will accept.
The right authenticator app iPhone users choose depends on where they want codes stored, which devices they use, and how they will recover after a phone change. Compare those decisions before moving an existing factor. Then enroll one account and confirm a fresh sign-in while the original method still works.
Which Authenticator App iPhone Users Should Choose
For a service that supports standard time-based codes, both an integrated vault and a dedicated iOS authenticator app can be suitable. The choice changes where the setup secret lives and how you retrieve it. A provider-specific approval or Apple Account sign-in has its own requirements. Check the challenge before assuming that every second factor is a code.
| Option | Best fit | Check before switching |
|---|---|---|
| Apple Passwords | You want built-in verification-code filling on supported Apple devices | Whether you want passwords and codes in one vault |
| Authenticator App by Begamob | You prefer keeping compatible code entries together in a dedicated app | Device support and recovery behavior |
| Google Authenticator | You want a dedicated code app with documented sync and manual transfer choices | Whether you want to use a Google Account for sync |
| 2FAS Auth | You want an open-source authenticator available for iPhone | Backup and transfer for the devices you use |
| Employer-required app or key | Your work or school gives you a specific enrollment | Which methods your organization permits |
Apple Passwords for Built-In Verification Codes
Apple Support documents setting up one-time verification codes with a QR or manual key and filling them from Passwords. That makes it a practical choice when you already keep credentials there. Decide how you will protect and recover the vault itself. If someone gains access to a vault holding both credentials, the separation you get from putting them in different tools is reduced.
Dedicated iPhone Authenticators
Begamob’s documents QR and manual setup for compatible TOTP entries and offline code generation. It can help when you want a dedicated list for several accounts. Google Authenticator’s official help describes optional Google Account sync and a supported manual transfer. The 2FAS publisher describes its authenticator as open source, and its App Store listing confirms iPhone availability. For any authenticator app iPhone users download, verify the publisher and learn the recovery workflow before enrolling an account.
An authenticator app iPhone users pick for a single account should still be assessed for recovery. If you already use Apple devices and want built-in code filling, start with the option you understand. If you want a separate app with a cross-device transfer workflow, read its official help before enrolling. The best choice is the one the service supports and you can restore.
Tell App Codes From Apple Account Verification
Apple’s own two-factor authentication uses trusted devices and trusted phone numbers for its verification codes. Apple Support documents this process separately. An authenticator app iPhone users install for third-party TOTP does not replace the trusted-device prompt for Apple Account just because both can show numbers.
If the Prompt Is for Apple Account
Read which account the device shows and follow the Apple Account sign-in screen. If you no longer have a trusted device or number, use the recovery options Apple provides. A code app used for another website cannot recreate Apple’s trusted-device verification code. Keep access to a supported trusted route before you reset or replace the phone.
If the Prompt Is for a Third-Party Account
Start with that website’s security settings. If it offers standard authenticator codes, enroll with the QR or setup key it issues. If it says to approve a request in a specific app, use the method that service registered. The iPhone is the device you use, while the provider controls which proof the account accepts.
You may receive an Apple Account prompt while installing a dedicated authenticator. Finish that Apple prompt through the trusted-device flow. Then return to the website whose account you meant to protect. An authenticator app iPhone users download for a bank, community, or work account does not turn on that account’s second factor by installing alone.
Add an Account With the Provider’s QR Code
Open the service’s account security page on a trusted device. Choose its authenticator option and keep the enrollment screen open. A compatible authenticator app iPhone users already trust can scan the enrollment information from that screen. The QR may contain a reusable secret, so do not share a screenshot or post it in a support message.
Scan From the App’s Account-Add Screen
Use the authenticator’s own add-account option. If the QR appears on a laptop, hold the iPhone so the entire square is visible in the scanner. Check that you are scanning the correct provider and account. If your authenticator asks for camera permission, grant it only when you intend to scan in the trusted app. A generic camera scan may take you to a different flow than the app’s account-add screen.
Confirm the First Code on the Service
After scanning, look for the new entry and check its label. Enter a fresh value in the service’s enrollment screen to finish. If the countdown is about to change, wait for the next value. The first successful confirmation tells you the authenticator app iPhone users enrolled is associated with the right service. Then test a fresh sign-in while the original session stays available.
If the provider opens a QR after you select an authenticator app, keep that browser tab active until you finish the first code. An authenticator app iPhone users install can display a value immediately after it reads the secret. Only the service’s confirmation tells you that the enrollment passed. If it expires, restart from the same verified account.
Download Authenticator App
Secure your accounts with fast, reliable two-factor authentication. Download now and protect your login in seconds.
Set Up With a Manual Key on the Same Phone
Sometimes the account page and authenticator are on the same iPhone. If the provider offers a manual key, you can enter it in the app rather than pointing the camera at your own screen. A second trusted screen is also useful if the service only gives you a QR. Start from the provider’s own setup flow.
Copy Only What the App Asks For
Open the authenticator’s manual enrollment option and enter the setup secret and label where requested. The setup key is not the short value you type into the account’s normal sign-in challenge. Keep the key out of shared notes or messages. If you use a clipboard, paste into the intended authenticator and avoid leaving the secret in unrelated documents.
Check the Account Label and Type
Choose the type the provider specifies if the app gives you a choice. Standard TOTP uses the shared secret and the current time, as RFC 6238 describes. A different algorithm can produce numbers that the service will reject. For an authenticator app iPhone users rely on across accounts, clear labels are especially useful if two services have similar icons.
If you are setting up the same account on two trusted devices, use the provider’s instructions for multiple registrations. Some methods support adding another device. Others depend on transferring one enrollment or issuing a new key. An authenticator app iPhone users set up by manual key can still generate codes from an older registration the account no longer accepts.
Sign In and Verify the Correct Entry
If you use an authenticator app iPhone users can open offline, it may still show valid app-generated values without cell service. Google Account Help documents this behavior for Google Authenticator. The browser or device signing into the account needs a connection to the provider. Keep those two tasks separate when troubleshooting.
Copy the Code or Let a Supported Tool Fill It
An integrated tool may offer to fill the value on the right site. Apple’s iPhone guide also describes copying a verification code from Passwords if a suggestion does not appear. Before filling or pasting, verify the service and the account. If several entries look alike, compare the full email address instead of assuming the first value is the right one.
Keep Unexpected Requests Out of the Flow
Do not type an authenticator code into a page opened by an unsolicited caller or message. A manually entered code can be captured and relayed through phishing, as NIST’s authentication guidance explains. If the account supports a phishing-resistant method such as a compatible FIDO credential, consider it for sensitive accounts and keep a recovery route you can reach.
When testing an authenticator app iPhone users set up, choose a fresh browser session. The device you usually use can remember the sign-in and skip the verification challenge. If the prompt never appears, confirm which method the provider used. Keep the known working session until you can show that the new code was actually accepted.
Move Your Accounts Before Replacing the iPhone
Check how your particular authenticator handles migration. A copied app icon does not prove that the account entries were restored. Some tools offer sync, an export or transfer process, or provider-specific recovery. Other accounts may need to be enrolled again through their security settings.
| Situation | First move | What confirms it worked |
|---|---|---|
| Both phones are available | Use the trusted app’s supported transfer or provider re-enrollment | A fresh sign-in using the new iPhone |
| Same app restored from backup | Check whether entries and expected accounts are present | The provider accepts each current value |
| Old iPhone is lost | Use an enrolled alternative or provider recovery | You regain access and register a working factor |
| Work app names a specific phone | Follow organization instructions | Its required challenge succeeds on the replacement |
Test One Account Before the Rest
Choose an important account for which you still have a backup option. Use the authenticator app iPhone users plan to keep on the new device, then try a fresh sign-in. If it works, check the other accounts individually. Keep the old device available until the required methods work. If you re-enrolled a factor rather than copying its secret, review the older registrations after the test.
Replace an Exposed or Untrusted Enrollment
If you cannot trust an old phone or setup image, use the provider’s process to change the registration instead of deleting only the local copy. Deleting the authenticator app from a device does not tell the account to stop requiring the old factor. Keep a working route until you have confirmed the replacement. For a work account, ask the organization how to remove the old device.
Before moving the authenticator app iPhone users rely on, open its current settings and check whether sync or another backup option is enabled. Verify which account controls that recovery. Do not assume that restoring the whole phone will restore the contents of each verification app. Make sure you have an alternate sign-in for the services you use most.
Fix an iPhone Code That Keeps Failing
If an authenticator app iPhone users already enrolled shows a number the service rejects, check the account name, the timer, and the method on the active prompt. The app may still hold a stale entry from a previous reset. Avoid replacing it until you can reach an independent route.
Check Automatic Time and Use a Fresh Value
A time-based code depends on the clock. Enable automatic date and time if your device configuration permits it. Wait for a fresh value, then enter it while the prompt is active. If several entries fail, check the phone’s time before changing individual registrations. If only one fails, focus on its account and setup history.
Check Whether the Provider Expects Another Method
A text, a device approval, and an authenticator code can appear in related sign-in flows. A copied value from the wrong type of method will not complete the intended challenge. Read the field label and choose a supported alternative where offered. Use official account recovery if you cannot open the registered factor.
If the authenticator app iPhone users use works for other accounts on the same device, start with the failed account’s enrollment instead of changing the phone’s general settings. Compare the email address, organization, and provider shown on the challenge. If you just reset the factor, look for an older entry with a similar label and test the current one first.
Set a Recovery Path Before Relying on the App
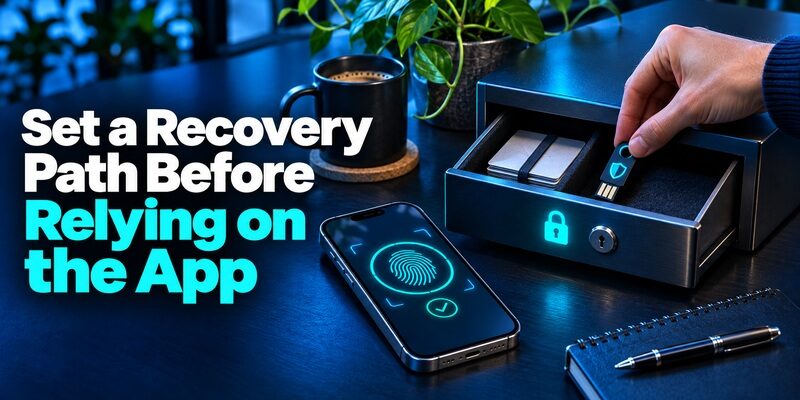
Choose an independent backup that does not require the same iPhone to reach. A service may provide backup codes, a second enrolled device, or a spare key. Check what the specific account supports. Store the recovery material securely and test the route without making it the only remaining method.
Check the Vault’s Recovery Separately
If the authenticator app iPhone users rely on is integrated with a password vault, find out how you would unlock that vault on a replacement device. If its only second factor is inside the vault, recovery can depend on access you no longer have. Use an independent recovery method where the provider supports it.
Verify the Download and Publisher
For a dedicated app, compare its App Store publisher to the project’s official documentation. Similar product names are common. Read the requirements and restore options for your device before moving a real account. If you cannot establish who publishes the app or where its enrollment data goes, keep the working method while you check.
Download the authenticator app iPhone users choose from its verified store listing or use the built-in tool. Review the app’s permissions and backup process before adding real accounts. If the service names an employer-managed app, use that enrollment route. If you cannot tell which option applies, read the prompt from the beginning without entering a code.
Questions About iPhone Authenticator Apps
Does iPhone Have an Authenticator Built In?
Yes. Apple documents support for automatic verification codes in Passwords on compatible devices. The website or service has to offer compatible setup information. Some organizations instead require a dedicated approval app or a security key.
Is Apple Account Two-Factor Authentication the Same Setup?
No. Apple Account uses its own trusted-device and trusted-number workflow. An app you use to generate codes for other websites does not replace that workflow. Use Apple’s official recovery route when those trusted options are unavailable.
Can iPhone Codes Work Without a SIM Card?
A configured time-based authenticator can generate a code without a text message or mobile service. The device that submits the code still needs to reach the provider. Use the service’s delivered-code method if the prompt specifically asks for a text.
Do All Apps Use the Same Setup Key?
They can calculate matching values only if the enrollment data, algorithm parameters, and time step match. Use the provider’s setup QR or key and a compatible tool. Never assume that a provider-specific push prompt accepts a code from another app.
Can I Remove the Old App After I Switch?
Test the new method and check recovery first. If you changed enrollment at the service, confirm what happened to the old registration. Keep any still-needed factor until the replacement works for every relevant account.
Final Thoughts
Choose the authenticator app iPhone users can enroll with the services they actually use and restore after a device loss. Apple Passwords can cover built-in codes for compatible accounts. A dedicated app can keep the verification entries separate. Use the approved provider-specific method for accounts that require it.
Start the setup in the service’s security settings, keep its QR or manual key private, and verify the first code on the real page. Before ending your current session, test a fresh sign-in and confirm a recovery route you can reach without the iPhone. Do that for each important account before wiping the old device.
A short recovery test is worth doing before a trip or upgrade. Put the old phone aside and confirm which trusted device, key, or provider-issued recovery value you can reach. For a managed account, keep the organization’s support contact outside the account.
Download Authenticator App
Secure your accounts with fast, reliable two-factor authentication. Download now and protect your login in seconds.